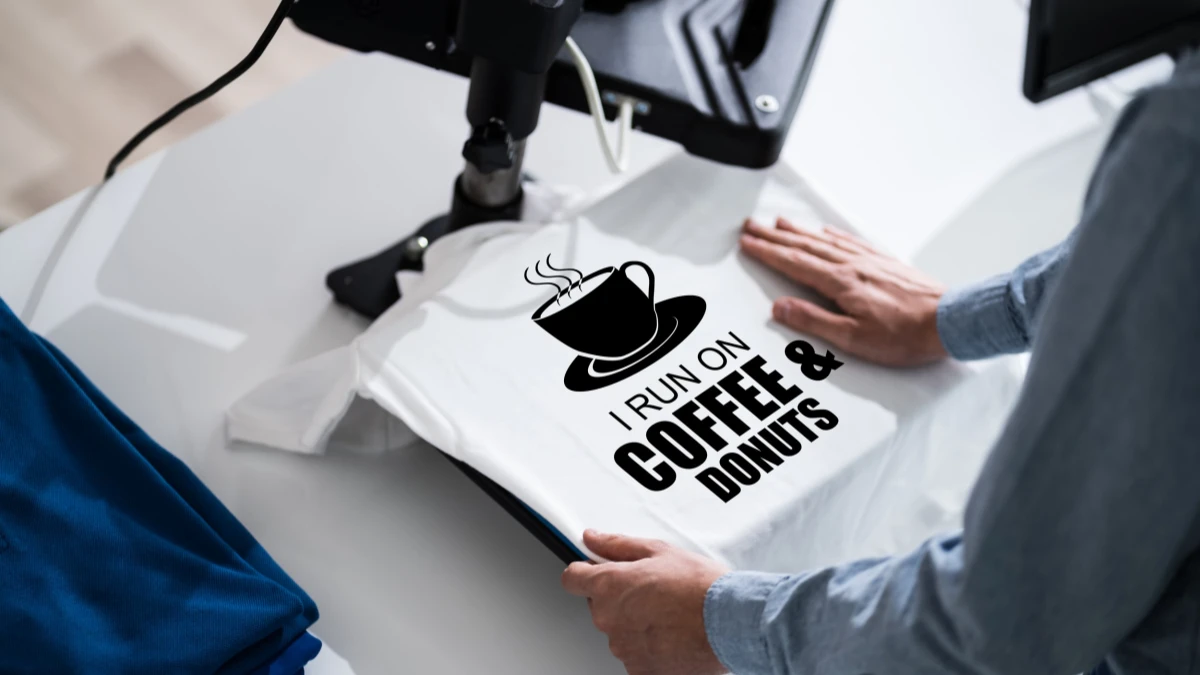
Вы хотите сделать толстовку с нашивкой на заказ, но не знаете, как начать. Не волнуйтесь. Многие люди испытывают трудности с такими вещами, как выбор правильного стабилизатора, удерживание ткани на месте, и аккуратно обрезать нитки. Если вы будете следовать правильным шагам, вы сможете избежать этих ошибок и сделать то, что вам понравится. В этом руководстве вы найдете простые советы, которые помогут вам превратить вашу идею с толстовкой в интересный и замечательный проект.
Основные выводы
Начните свой дизайн толстовки выбрав четкую тему и послание. Это поможет сделать его особенным и значимым для вас. - Выбирайте прочные ткани, например хлопковые смеси или плотный трикотаж. Такие ткани хорошо держат нашивки и служат долго после многочисленных стирок. - Выбирайте типы и цвета нашивок, которые соответствуют вашему стилю. Убедитесь, что они выделяются на фоне толстовки, чтобы выглядеть смело. - Размещайте заплатки с осторожностью, используя мерки и макеты. Это позволит сохранить дизайн сбалансированным и аккуратным. - Прикрепите заплатки, пришив их для прочности, или используйте утюг для быстрого результата. Вы также можете сделать и то, и другое, чтобы придать им дополнительную прочность.
Видение и тема
Вдохновение
Прежде чем вы сделаете свой толстовка с нашивками на заказПодумайте о том, что вам нравится. Идеи могут приходить из разных мест. Возможно, вам нравятся определенные цвета, хобби или мультфильм, который вам нравится. Оглянитесь вокруг и посмотрите, что привлекает ваше внимание. Вам нравятся старомодные фасоны или яркие, новые? Может быть, вы хотите, чтобы ваша толстовка выглядела художественно или весело.
Винтажные и ретро-дизайны создают ощущение старой школы
Художественные или цветочные нашивки добавляют креативный стиль
Нашивки с алфавитом или монограммой сделают его индивидуальным
Мультяшные и анимешные нашивки выглядят игриво и круто
Цитаты-высказывания демонстрируют, во что вы верите
Минималистичный дизайн используйте простые формы и линии
Смешанные материалы и текстуры делают его непохожим на другие
Негабаритные или трехмерные нашивки сильно выделяются.
Экологически чистые материалы полезны для планеты
Совет: Соберите фотографии, рисунки или кусочки ткани, которые соответствуют вашим любимым стилям. Это поможет вам увидеть, что вам нравится, прежде чем вы начнете создавать дизайн.
Сообщение
Подумайте, что вы хотите, чтобы ваша толстовка говорила о вас.. Четкая идея делает ваш дизайн особенным и индивидуальным. Когда вы знаете свое послание, вы можете выбрать цвета, форму нашивок и место их расположения. Это поможет ваша толстовка расскажите свою историю.
Знание своего послания также облегчает работу. Вы будете знать, какие нашивки соответствуют вашему стилю, а какие нет. Ваш выбор будет иметь большее значение, а ваша толстовка будет выглядеть законченной. Хотите ли вы показать свою любовь к музыке, поделиться цитатой или оставить все как есть - ваше послание поможет вам решить все.
Основа для толстовки с нашивкой на заказ
Выбор ткани
Правильный выбор ткани создает основу для вашего толстовка с нашивками на заказ. Вам нужна вещь, которая будет приятна на ощупь и прослужит долго. Некоторые ткани подходят для заплаток лучше, чем другие. Вот несколько лучших вариантов:
Полиэстер и смеси хлопка и полиэстера хорошо держатся. Они не поддаются усадке и растяжению, поэтому ваши заплатки остаются на месте после многочисленных стирок.
Хлопок мягкий на ощупь и позволяет коже дышать. Лучше всего подходит высококачественный хлопок, потому что он не скатывается и не изнашивается быстро.
Шерсть Сохраняет тепло и остается прочным даже после длительного использования.
Ацетат и шелк Они гладкие и не мнутся, что облегчает шитье и вышивку.
Полиуретан Придает гладкость и не задирается при пришивании заплаток.
Совет: Более плотные толстовки и толстовки из плотного трикотажа (например, из трехстороннего флиса) служат дольше и лучше держат заплатки. Если ваша толстовка сильно растягивается, заплатки могут морщиться или выглядеть неровно.
Выбирая ткань, подумайте о том, как вы будете за ней ухаживать. Смеси и синтетика обычно не требуют особого ухода и сохраняют форму.
Выбор цвета
Цвет толстовки может сделать ваши нашивки заметными или слиться с ними. Если вы хотите, чтобы ваши нашивки выделялись, выбирайте цвета, контрастирующие с рисунком. Например, Светлые заплатки отлично смотрятся на темных толстовкахТемные пятна лучше всего видны на светлых фонах.
Старайтесь не наносить светлые нашивки на светлые толстовки и темные - на темные. Дизайн может потеряться.
Дополнительные цвета, например синий и оранжевый или красный и зеленый, создают сильный контраст и привлекают внимание.
Классические сочетания, такие как черное на белом или белое на черном, всегда хорошо работают, но вам может понадобиться дополнительная строчка, чтобы края были аккуратными.
Попробуйте наложить патчи на разные цвета толстовки прежде чем принять решение. Это поможет вам увидеть, какие сочетания выглядят лучше всего и соответствуют вашему стилю.
Выбор типа патча
Вышитые
Когда вы думаете о классических нашивках, вы, вероятно, представляете себе вышитые нашивки. В таких нашивках используются толстые нити, пришитые к ткани, что придает им дерзкий, рельефный вид. Вы можете почувствовать текстуру, проведя по ним пальцами. Нашивки с вышивкой на заказ отлично подходят для толстовок, потому что они хорошо переносят регулярную стирку. Если вы хотите, чтобы нашивка выглядела эффектно и была прочной, это отличный выбор.
Вот краткий обзор сравнения вышитых и тканых нашивок:
Характеристика | Вышитые нашивки | Тканые нашивки |
|---|---|---|
Внешний вид | Рельефная, 3D-текстура; смелые и классические | Гладкая, ровная поверхность; высокая детализация |
Разрешение деталей | Хорошо подходит для простых форм и больших букв | Отлично подходит для работы с мелким текстом и тонкими линиями |
Прочный, устойчивый к истиранию при правильном уходе | Плотное плетение, меньшая вероятность истирания | |
Гибкость | Эластичная основа, выдерживает движения | Тонкий и легкий, легко носить |
Идеальное использование | Куртки, шапки, униформа, толстовки | Детальные логотипы, нежные ткани |
Нашивки с вышивкой на заказ - это то, что нужно для традиционного образа. Они лучше всего подходят для смелых логотипов, названий команд или простых рисунков. Если вы хотите, чтобы ваши нашивки служили долго, просто не забывайте стирать толстовку в щадящем режиме.
Плетеные и другие виды
Плетеные нашивки - это совсем другой стиль. В них используются тонкие нити, плотно сплетенные между собой, поэтому вы получаете гладкую нашивку с четкими деталями. Если в вашем дизайне есть мелкие буквы или множество мелких линий, тканые нашивки на заказ сделают все четким и легко читаемым. Эти нашивки на ощупь легче и тоньше, чем вышитые на заказ, поэтому они хорошо подходят для легких толстовки или когда вам нужен ровный тон.
Вы также можете попробовать другие виды нашивок, например из ПВХ или синели. Вот некоторые моменты, которые следует знать:
В пластырях из ПВХ используется мягкая, гибкая резина. Вы можете сделать их любой формы и размера. Они водонепроницаемы и легко моются, что очень удобно для толстовки вы носите на улице.
Заплатки из шенилла имеют пушистую, текстурированную поверхность. Они выглядят забавно и на ощупь мягкие, идеально подходят для создания уютной атмосферы.
Нашивки из ПВХ и синели служат долго, если их пришить. Шитье требует больше усилий, чем глажка, но ваши нашивки останутся на месте после многих стирок.
Заплатки, наклеенные утюгом, быстро наносятся, но они могут прослужить не так долго, как пришитые заплатки.
Пользовательские нашивки бывают разных стилей. Вы можете смешивать и сочетать типы, чтобы создать толстовку, которая будет соответствовать вашей индивидуальности и выделяться в толпе.
Дизайн собственной заплатки: Макет
Размещение
Когда вы начинаете создавать свой собственный дизайн толстовки с нашивками, размещение - это все. Вы хотите, чтобы дизайн вашей нашивки выглядел сбалансированным и привлекал внимание. Начните с того, что посмотрите на особенности вашей толстовки. Обратите внимание на плечевые швы, центральную линию, карманы и завязки. Эти детали помогут вам решить, куда прикрепить каждую заплатку.
Вот несколько советов, которые помогут вам с размещением:
Измеряйте от плечевого шва или от центра толстовки. Так ваши заплатки будут ровными и прямыми.
Для толстовок разместите нашивку примерно так. От 5,5 до 8 дюймов ниже плечевого шва и от 3 до 4 дюймов от центра. Это место избегает карманов и завязок.
Если у вас нет поблизости линейки, используйте руку или пальцы в качестве быстрого измерительного инструмента.
Старайтесь не размещать нашивки над карманами, молниями или швами. Это позволит сохранить гладкость и удобство дизайна.
Разложите заплатки перед тем, как прикрепить их. Перемещайте их, пока не найдете тот образ, который вам нравится.
Совет: воспользуйтесь цифровым макетом или сделайте эскиз толстовки на бумаге. Это поможет вам увидеть, как будет выглядеть ваша заплатка, прежде чем вы начнете шить или гладить.
Выравнивание
Выравнивание делает ваш дизайн заплатки выглядеть профессионально. Вы хотите, чтобы все ваши заплатки выстроились в ряд и выглядели аккуратно. Сложите толстовку пополам, чтобы найти центр. Можно также сложить от плеча к плечу, чтобы проверить симметрию. Этот простой прием поможет вам сохранить равновесие.
Если вы создаете свою собственную заплатку из нескольких частей, соблюдайте равномерное расстояние между ними. Используйте шаблон или лист бумаги в качестве ориентира. Для толстовок разных размеров корректируйте расположение примерно на полдюйма для каждого размера вверх или вниз. Так ваша нашивка будет смотреться на любой толстовке.
Примечание: Всегда проверяйте свой макет, прежде чем прикреплять что-либо. Быстрая проверка убережет вас от ошибок и поможет вашему дизайну выделиться.
Размер и форма пластыря
Размеры
Правильно подобранный размер нашивки имеет большое значение. Если ваша нашивка будет слишком маленькой, люди могут не увидеть детали или не прочитать слова. Если она слишком большая, она может выглядеть неловко или казаться тяжелой. ваша толстовка. Вы хотите, чтобы ваш патч выделялся, но при этом вписывался в пространство.
При добавлении текста высота букв должна составлять не менее 0,25 дюйма. Такой размер поможет всем прочитать ваше сообщение даже на расстоянии. Для небольших логотипов или значков старайтесь, чтобы ширина нашивки была не менее 2 дюймов. Если вы хотите сделать большой и дерзкий образ, хорошо подойдут нашивки от 3 до 5 дюймов на груди или спине.
Совет: Вырежьте лист бумаги по размеру вашей нашивки и приложите его к толстовке. Этот прием поможет вам увидеть, правильно ли выглядит нашивка, прежде чем вы закажете или сделаете ее.
Вот краткое руководство для размеры заплат:
Расположение патча | Предлагаемый размер |
|---|---|
Грудь | 2"-4" в ширину |
Рукав | 1,5"-2,5" в ширину |
Назад | 4-6 дюймов в ширину |
Карман | 1"-2" в ширину |
Варианты формы
Вам не обязательно придерживаться только кругов или квадратов. Вы можете выбрать любую форму, которая соответствует вашему стилю или посланию. Классические формы, такие как круги, овалы и прямоугольники, выглядят аккуратно и подходят для большинства дизайнов. Если вам хочется чего-то веселого, попробуйте звезды, сердца или даже нестандартные формы, например, животных или логотипов.
Круглые заплатки ощущается дружелюбие и мягкость.
Прямоугольники Выглядят остро и подходят для длинных слов.
Щиты или значки придают им спортивный или винтажный вид.
Нестандартные формы позволят вам проявить свои творческие способности.
Примечание: Простые формы легче пришивать или приклеивать утюгом. Если вы выбрали форму с большим количеством точек или изгибов, убедитесь, что края ровные, чтобы заплатка держалась крепко.
Правильный выбор размера и формы поможет вашему пластырю выглядеть великолепно и прослужить дольше. Не торопитесь и попробуйте несколько идей, прежде чем принять решение!
Цвет и контраст
Цвета заплаток
Выбор правильных цветов для ваших нашивок имеет большое значение. Вы хотите, чтобы ваша нашивка выделялась и привлекала внимание людей. Начните с того, что подумайте, как цвета сочетаются друг с другом. Дополнительные цветакоторые расположены друг напротив друга на цветовом круге, создают сильный контраст. Например, красный и зеленый или синий и оранжевый сделают ваш патч ярким. Аналоговые цвета, расположенные рядом друг с другом, ощущаются как спокойные и гармоничные, но они не так сильно выделяются.
Вы также можете использовать монохроматические цвета, которые представляют собой различные оттенки одного и того же цвета. Такой стиль выглядит стильно, но может быть не таким смелым. Если вы хотите, чтобы ваша эмблема легко читалась, выбирайте высококонтрастные цветовые сочетания. Лучше всего подходят светлые цвета на темном фоне или темные цвета на светлом фоне. Например, нашивки темно-синего цвета с белыми или золотыми буквами легко читаются. На черном фоне темные буквы читаются с трудом.
Вот несколько советов по выбору цвета заплаток:
Ограничьте свой патч 2-4 цветами. Слишком много цветов могут выглядеть неаккуратно.
Подберите цвета к материалу нашивки. Неоновые и смелые цвета отлично смотрятся на ПВХ. Земляные тона подходят для кожи. Смелые блочные цвета хорошо подходят для синели.
Подумайте, кто будет носить толстовку. Яркие цвета подойдут для мероприятий. Более мягкие цвета выглядят спокойно и профессионально.
Совет: прежде чем принять решение, подержите цвета нашивок рядом друг с другом. Это поможет вам понять, хорошо ли они смотрятся вместе.
Контраст со свитшотом
Контраст между вашим пластырем и ваша толстовка меняет весь образ. Высокий контраст, например яркая нашивка на темной толстовке, привлекает внимание. Низкий контраст, например, светлая нашивка на светлой толстовке, кажется более мягким и утонченным.
Аспект | Что это значит | Как смотрится на вашей толстовке |
|---|---|---|
Светлые или темные участки между нашивкой и толстовкой | Высокий контраст выглядит смело и сильно, низкий - мягко. | |
Цветовой контраст | Разница в цветовых оттенках | Высокий цветовой контраст - игривый; низкий - серьезный |
Пропорция контраста | Размер нашивки по сравнению с толстовкой | Небольшие яркие нашивки могут выделяться на темных толстовках |
Влияние личности | Насколько контраст соответствует вашему стилю | Драматичным людям может нравиться больше контраста, а тонким типам - нет. |
Общение через контраст | Что контраст говорит о вас | Высокий контраст демонстрирует уверенность, низкий - дружелюбие |
Вы можете использовать контраст, чтобы показать свою индивидуальность. Если вы хотите выглядеть смело и уверенно, выбирайте высококонтрастные цвета. Если же вам нужен более мягкий и спокойный стиль, выбирайте цвета, которые сочетаются между собой. Даже небольшая заплатка яркого цвета может сделать вашу толстовку уникальной. Пробуйте разные сочетания, пока не найдете то, что подходит именно вам.
Простота дизайна
Выбор шрифта
Когда вы начинаете разрабатывать дизайн пластыря, выбор правильного шрифта имеет большое значение. Вы хотите, чтобы ваши слова выделялись и легко читались. Для вышивки лучше всего подходят жирные, открытые шрифты. Тонкие линии или причудливые шрифты могут потеряться в стежках. Простые шрифты без засечек, такие как Arial или Helvetica. сохраняйте ясность. Эти шрифты выглядят чисто и хорошо подходят практически для любого дизайна нашивок.
Если вам хочется чего-то более энергичного, попробуйте использовать жирные шрифты, такие как Impact или Futura. Они сделают дизайн вашей нашивки более ярким, особенно для спортивных или командных толстовок. Шрифт или скоропись могут придать индивидуальность, но используйте их только для коротких слов или инициалов. Мелкие, детализированные шрифты часто теряют свою форму при сшивании.
Категория стиля шрифта | Рекомендуемые шрифты | Лучшее для |
|---|---|---|
Простой шрифт Sans Serif | Arial, Helvetica | Повседневный, легко читаемый дизайн нашивки |
Смелые и впечатляющие | Импакт, Освальд, Футура | Спортивные, логотипы, нашивки |
Современный и минималистичный | Монтсеррат, Авенир, Проксима Нова | Изящный, деловой или официальный дизайн нашивки |
Элегантность и утонченность | Бикхэм Скрипт, Дидо, Плейфэйр | Особые случаи, использовать с осторожностью |
Совет: Всегда проверяйте размер шрифта. Буквы должны быть достаточно большими, чтобы их можно было прочитать с расстояния нескольких футов.
Читабельность
Вы хотите, чтобы все понимали ваши дизайн заплатки с первого взгляда. Сохраняйте простоту дизайна и избегайте беспорядка. Слишком много слов или изображений могут сделать вашу нашивку трудночитаемой. Используйте белое пространство, чтобы дать дизайну нашивки возможность дышать. Ограничьте количество цветов и элементов, чтобы не было ощущения тесноты.
К распространенным проблемам в дизайне пластырей относятся слишком мелкие или слишком вычурные шрифты. Если вы используете шрифт, который трудно прочитать, люди могут пропустить ваше сообщение. Убедитесь, что между буквами достаточно места. Это поможет вышивке выглядеть аккуратно и не даст стежкам сливаться друг с другом.
Используйте крупные и четкие шрифты.
Избегайте размещения слишком большого количества текста или изображений на одной нашивке.
Проверьте дизайн заплатки, посмотрев на нее с расстояния.
Простой, чистый дизайн пластыря всегда выглядит лучше и служит дольше. Если сомневаетесь, лучше меньше, чем больше!
Границы и подложки для заплаток
Типы границ
Границы не просто придают заплатке законченный вид - они помогают предотвратить истирание и сохранить прочность ваших пользовательских заплаток. У вас есть несколько основных вариантов окантовки. Каждый из них лучше всего подходит для разных форм и стилей заплаток.
Характеристика | Мерный край | Вышитый бордюр |
|---|---|---|
Лучшее для фигур | Простые, стандартные формы (круги, квадраты, овалы) | Сложные или неправильные формы |
Долговечность | Высокая прочность, предотвращает истирание | Менее прочные по краям |
Внешний вид и отделка | Гладкая, рельефная, полированная граница | Легко сочетается с дизайном патчей |
Настройка | Ограничено определенными формами | Работает для всех форм |
Для обработки края используется толстая оверлочная строчка. Такая кайма кажется прочной и придает вашей нашивке классический вид. Она лучше всего подходит для простых форм. Вышитые границы вписываются в дизайн нашивки и подходят для любой формы, но они могут быть не такими прочными по краям. Надрежьте края заплатки, запечатав их ровным и гладким слоем.. Этот стиль хорошо подходит для детализированных или нестандартных патчей. Вы также можете попробовать двойная строчка или атласные стежки для дополнительной прочностиОсобенно если ваш пластырь будет часто использоваться.
Совет: Если вы хотите, чтобы заплатка служила долго, выбирайте для простых фигур зазубренный край, а для сложных узоров - кайму с термической резкой.
Варианты подложки
От выбранной вами подложки зависит, как вы прикрепите ваши индивидуальные нашивки и как долго они будут держаться. У вас есть два основных варианта: глажка и пришивание.
Железная основа
Быстрая и простая в использовании. Просто возьмите утюг и нажмите.
Отлично подходит для начинающих или быстрых проектов.
После завершения работы выглядит аккуратно и чисто.
Не подходит для термочувствительных тканей, таких как шелк или шерсть.
Клей может ослабнуть после многих стирок, поэтому впоследствии вам придется заново гладить или подшивать.
Пришивная основа
Суперпрочный и долговечный.
Работает с любыми тканями, даже с теми, которые не переносят нагрев.
Для этого нужны иголка и нитки, поэтому требуется больше времени и умения.
Обеспечивает самую надежную фиксацию, идеально подходит для толстовки, которые вы часто носите.
Некоторые используют оба метода - сначала гладят нашивку, а затем прошивают по краю для дополнительной прочности. Благодаря такому сочетанию ваши нашивки будут выглядеть привлекательно и сохранят свой вид даже после многочисленных стирок.
Примечание: Если вы хотите, чтобы ваша заплатка служила долго, пришейте ее. Если вы хотите быстро исправить ситуацию, попробуйте приклеить ее утюгом. Всегда проверяйте ткань перед началом работы.
Создайте свой собственный патч: Макет
Когда вы начинаете Создайте свою собственную толстовку с нашивкамиВы хотите увидеть, как будут выглядеть ваши идеи, прежде чем воплощать их в жизнь. Моделирование дизайна поможет вам выявить проблемы, попробовать разные стили и поделиться своим видением с другими. Вы можете использовать простые эскизы или перейти к цифровым инструментам - и у тех, и у других есть свои сильные стороны.
Скетчинг
Возьмите карандаш и бумагу. Скетчинг - это самый быстрый способ чтобы перенести свои идеи из головы на страницу. Рисовать можно где угодно, и вам не нужны модные принадлежности. Этот метод отлично подходит, когда вы хотите обмозговать множество идей для дизайна своей собственной заплатки. Вы можете быстро попробовать разные формы, размеры и расположение. Если вам не понравится одна идея, просто скомкайте бумагу и начните сначала. Эскизы помогают сосредоточиться на общей картине, а не на мелких деталях.
Совет: Используйте эскизы, чтобы поделиться своими идеями с друзьями или семьей. Они могут дать обратную связь, прежде чем вы перейдете к более детальной работе.
Однако эскизы могут быть немного грубыми. Они могут не отображать все детали или цвета, которые вы хотите. Иногда другим трудно понять, что именно вы имеете в виду, особенно если дизайн вашей нашивки сложный.
Цифровые инструменты
Если вам нужен отполированный внешний вид, цифровые инструменты - ваш лучший друг. Такие программы, как Adobe Photoshop и Illustrator позволяет создавать детальные, красочные макеты, которые выглядят почти как настоящие. Вы можете использовать шаблоны, добавлять текст и даже пробовать разные стили вышивки. Canva - еще один простой инструмент с множеством иконок и шрифтов для создания собственной нашивки. Некоторые онлайн-платформы, например Printful Design Maker, позволяют загружать свои рисунки и предварительно просматривать их на толстовке.
Вот краткое сравнение чтобы помочь вам с выбором:
Аспект | Нарисованные от руки эскизы | Цифровые макеты |
|---|---|---|
Скорость | Очень быстро | Требует больше времени |
Деталь | Основные формы и расположение | Высокая детализация, цвета, текстуры |
Поделиться | Легко с друзьями | Отлично подходит для демонстрации поставщикам |
Редактирование | Быстро начать сначала | Легко редактировать и дорабатывать |
Некоторые поставщики даже предлагают бесплатные цифровые макеты и неограниченное количество правок. Вы можете отправить им свой эскиз, и они превратят его в профессиональный дизайн. Это облегчает разработку собственной нашивки и помогает получить именно то, что вы хотите.
Поставщики
Likeu Clothing
Если вы хотите, чтобы изготовление толстовки с нашивкой было простым, Likeu Clothing - отличный выбор. Они предоставляют вам множество вариантов, таких как различный вес ткани и особые свойства. Вы можете выбрать легкие, средние или тяжелые толстовки. Likeu Clothing позволяет изменять практически все детали толстовки. Вы можете добавить нашивки на грудь, спину или рукава. Вы можете выбрать вышивку, трафаретную печать, DTG, DTF, сублимацию, индивидуальные тканые бирки или кожаные нашивки.
Вот краткий обзор того, что предлагает Likeu Clothing:
Категория характеристики | Предложения Likeu Clothing |
|---|---|
Вес ткани | Легкий вес (240GSM), средний вес (300GSM), тяжелый вес (400GSM) |
Методы настройки | Вышивка, трафаретная печать, DTG, DTF, сублимация, тканые бирки, кожаные нашивки |
Функциональные особенности | Карманы-кенгуру, отверстия для больших пальцев, ветрозащитные панели, отделка Hi-Vis, светоотражающий принт |
Варианты посадки | Классический унисекс, спортивная кофта, уличная одежда больших размеров |
Гибкость заказа | Нулевое минимальное количество заказов (от 1 до 5,000+ единиц) |
Время производства | Быстрое производство (10-14 дней на 400 штук) |
Характеристики долговечности | Прошивка тройными иглами, промышленные молнии, устойчивая к выцветанию отделка, 50+ циклов промышленной стирки |
Экологически чистые варианты | Сертифицированный OEKO-TEX органический хлопок, переработанный полиэстер |
Поддержка заказов | Прозрачный рабочий процесс, бесплатные 3D-макеты, доставка образцов в течение 72 часов |
Доставка | Быстрая, надежная доставка с отслеживанием и надежной упаковкой |
Вы получаете квалифицированную помощь, быстрое изготовление, и вам не нужно заказывать много. Likeu Clothing также заботится о планете и использует прочные, долговечные пластыри. Их команда помогает вам от начала и до конца, от дизайна до доставки.
Другие варианты
Существует множество мест, где можно изготовить толстовку с нашивкой на заказ. Вот несколько советов, которые помогут вам выбрать лучшее:
Выбирайте поставщика, который быстро отвечает на ваши вопросы и четко.
Убедитесь, что они могут делать особые вещи, которые вы хотите, и помогают вам на этом пути.
Почитайте, что говорят другие покупатели, чтобы узнать, доверяют ли им люди.
Проверьте, используют ли они хорошие материалы и умеют ли делать толстовки на заказ.
Спросите, есть ли у них экологически чистые варианты, если вы заботитесь о Земле.
Узнайте, предлагают ли они различные основы для заплатокНапример, приклеивание утюгом или липучкой.
Попросите образец, чтобы вы могли проверить качество швов и отделки.
Выбирайте компанию, которая может выполнять как маленькие, так и большие заказы.
Ищите поставщиков, которые используют новые технологии и предлагают множество услуг.
Другие хорошие поставщики - The/Studio, Custom Ink и Patchion. Каждый из них хорош в своем деле, поэтому сравните их, прежде чем выбрать. Хороший поставщик поможет вам сделать толстовку с нашивками на заказ, которая будет выглядеть потрясающе и прослужит долго.
Методы применения
Когда вы закончите разработку патча, его нужно прикрепить к ваша толстовка. У вас есть два основных варианта: шитье или глажка. У каждого метода есть свои преимущества. Давайте рассмотрим оба варианта, чтобы вы могли выбрать, что вам больше подходит.
Шитье
Шитье обеспечивает прочную фиксацию. Если вы хотите, чтобы ваша заплатка оставалась на долгие годы, вам подойдет этот способ. Вы можете шить вручную или использовать швейную машинку. Строчка проходит по всему краю нашивки, фиксируя ее на месте. Этот способ подходит для любой ткани, даже деликатной.
Вот краткое сравнение:
Метод применения | Характеристики долговечности | Дополнительные заметки |
|---|---|---|
Пришивные заплатки | Высокопрочная строчка обеспечивает прочное и долговечное соединение, выдерживающее частые стирки и интенсивное использование. | Действует на все ткани; редко требует повторного нанесения. |
Накладные заплатки | Умеренная прочность; клейкое соединение ослабевает со временем, особенно при многократном мытье и ношении, что может привести к отслаиванию или отклеиванию. | Только для термостойких тканей; может потребоваться повторное нанесение. |
Шитье занимает больше времени, но зато вы получаете заплатку, которая выдержит множество стирок и грубое использование. Если вам нужна дополнительная защита, вы можете даже пришить заплатку, наклеенную утюгом.
Совет: Используйте прочную нить и делайте маленькие ровные стежки. Так ваша заплатка будет ровной и аккуратной.
Железный лист
Наклеивание заплаток утюгом - это быстро и просто. Вам понадобится только горячий утюг и несколько минут времени. Заплатка имеет клей на обратной стороне, который плавится и прилипает, когда вы прижимаете ее теплом. Этот метод лучше всего подходит для толстовок из хлопка или полиэстера.
Чтобы ваша заплатка прослужила долго, выполните следующие действия:
Почистите и высушите толстовку. Убедитесь, что на ней нет ворса и пыли.
Положите толстовку ровно и разгладьте все морщины.
Поместите заплатку в нужное место. Накройте ее тканью для прессования.
Выверните толстовку наизнанку. Прогладьте заднюю часть нашивки еще 30 секунд.
Дайте всему остыть в течение как минимум 5 минут.
Проверьте края заплатки. Если они приподнимаются, прижмите их еще раз с помощью тепла.
Для дополнительной прочности сделайте несколько стежков по краю.
Примечание: Стирайте толстовку наизнанку в щадящем режиме и сушите на воздухе.. Это поможет вашему пластырю держаться дольше.
Шитье обеспечивает наибольшую прочность заплаты, но для быстрого результата отлично подходит глажка. Если вы хотите получить лучшее из двух миров, сначала прогладьте заплатку утюгом, а затем пришейте по краю. Ваша заплатка будет выглядеть великолепно и прослужит долго!
Теперь у вас есть 10 важных советов, которые помогут вам создать толстовку с индивидуальной нашивкой, которая будет выделяться на фоне других. Не забывайте планировать дизайн, сохраняйте простоту и дайте волю своему творчеству. Избегайте таких распространенных ошибок, как использование горячей воды или пропуск этапа создания макета. Пробуйте новые идеи и используйте такие удобные для начинающих инструменты, как лоскутки ткани или термотрансферный винил. Если вам нужна дополнительная помощь, Likeu Clothing и другие Гиды готовы оказать вам поддержку.
Начните свое путешествие с нашивкой уже сегодня - ваша единственная в своем роде толстовка уже ждет вас! 🎨🧵
ЧАСТО ЗАДАВАЕМЫЕ ВОПРОСЫ
Как сделать так, чтобы патчи не отваливались после стирки?
Всегда пришивайте заплатки, чтобы они лучше держались. Если вы используете заплатки, наклеенные утюгом, прижмите их с помощью нагрева, а затем пришейте по краям. Стирайте толстовку, вывернув ее наизнанку и используйте холодную воду, чтобы пластыри держались дольше.
Можно ли использовать для нашивок любую толстовку?
Вы можете используйте большинство толстовокНо лучше всего подходят плотные ткани. Тонкие или растягивающиеся толстовки могут плохо держаться на заплатках. Постарайтесь выбрать прочную толстовку из хлопка или хлопчатобумажной смеси, чтобы добиться наилучшего результата.
Что делать, если я ошибся с размещением пластыря?
Не волнуйтесь! Если вы еще не пришили или не прогладили заплатку, просто переместите ее. Если вы уже прикрепили ее, аккуратно удалите стежки или подогрейте заплатку, чтобы ослабить клей. Попробуйте еще раз, пока вам не понравится внешний вид.
Нужны ли специальные инструменты для установки патчей?
Вам не нужны модные инструменты. Достаточно иголки с ниткой или обычного утюга. Если вы хотите шить быстрее, вам поможет швейная машинка. Всегда используйте острые ножницы, чтобы края были чистыми.
Можно ли смешивать разные типы нашивок на одной толстовке?
Да! Вы можете смешивать вышитые, тканые, ПВХ или синельные нашивки. Только убедитесь, что каждая заплатка подходит к вашему дизайну и ткани. Смешение стилей может сделать вашу толстовку уникальной и забавной.